
Moderating Live Video Interviews
Anyone who will be participating in a live video interview, including the Host, should be encouraged to use the System Check several minutes prior to the scheduled start time.

More information on System Checks can be found here.
Joining the Meeting
Starting 15 minutes before the designated start time of a Live Video Interview, a Join Meeting button will appear on the interview activity page for the host, the participant, and any other administrator with the permissions to join the backroom of the meeting.
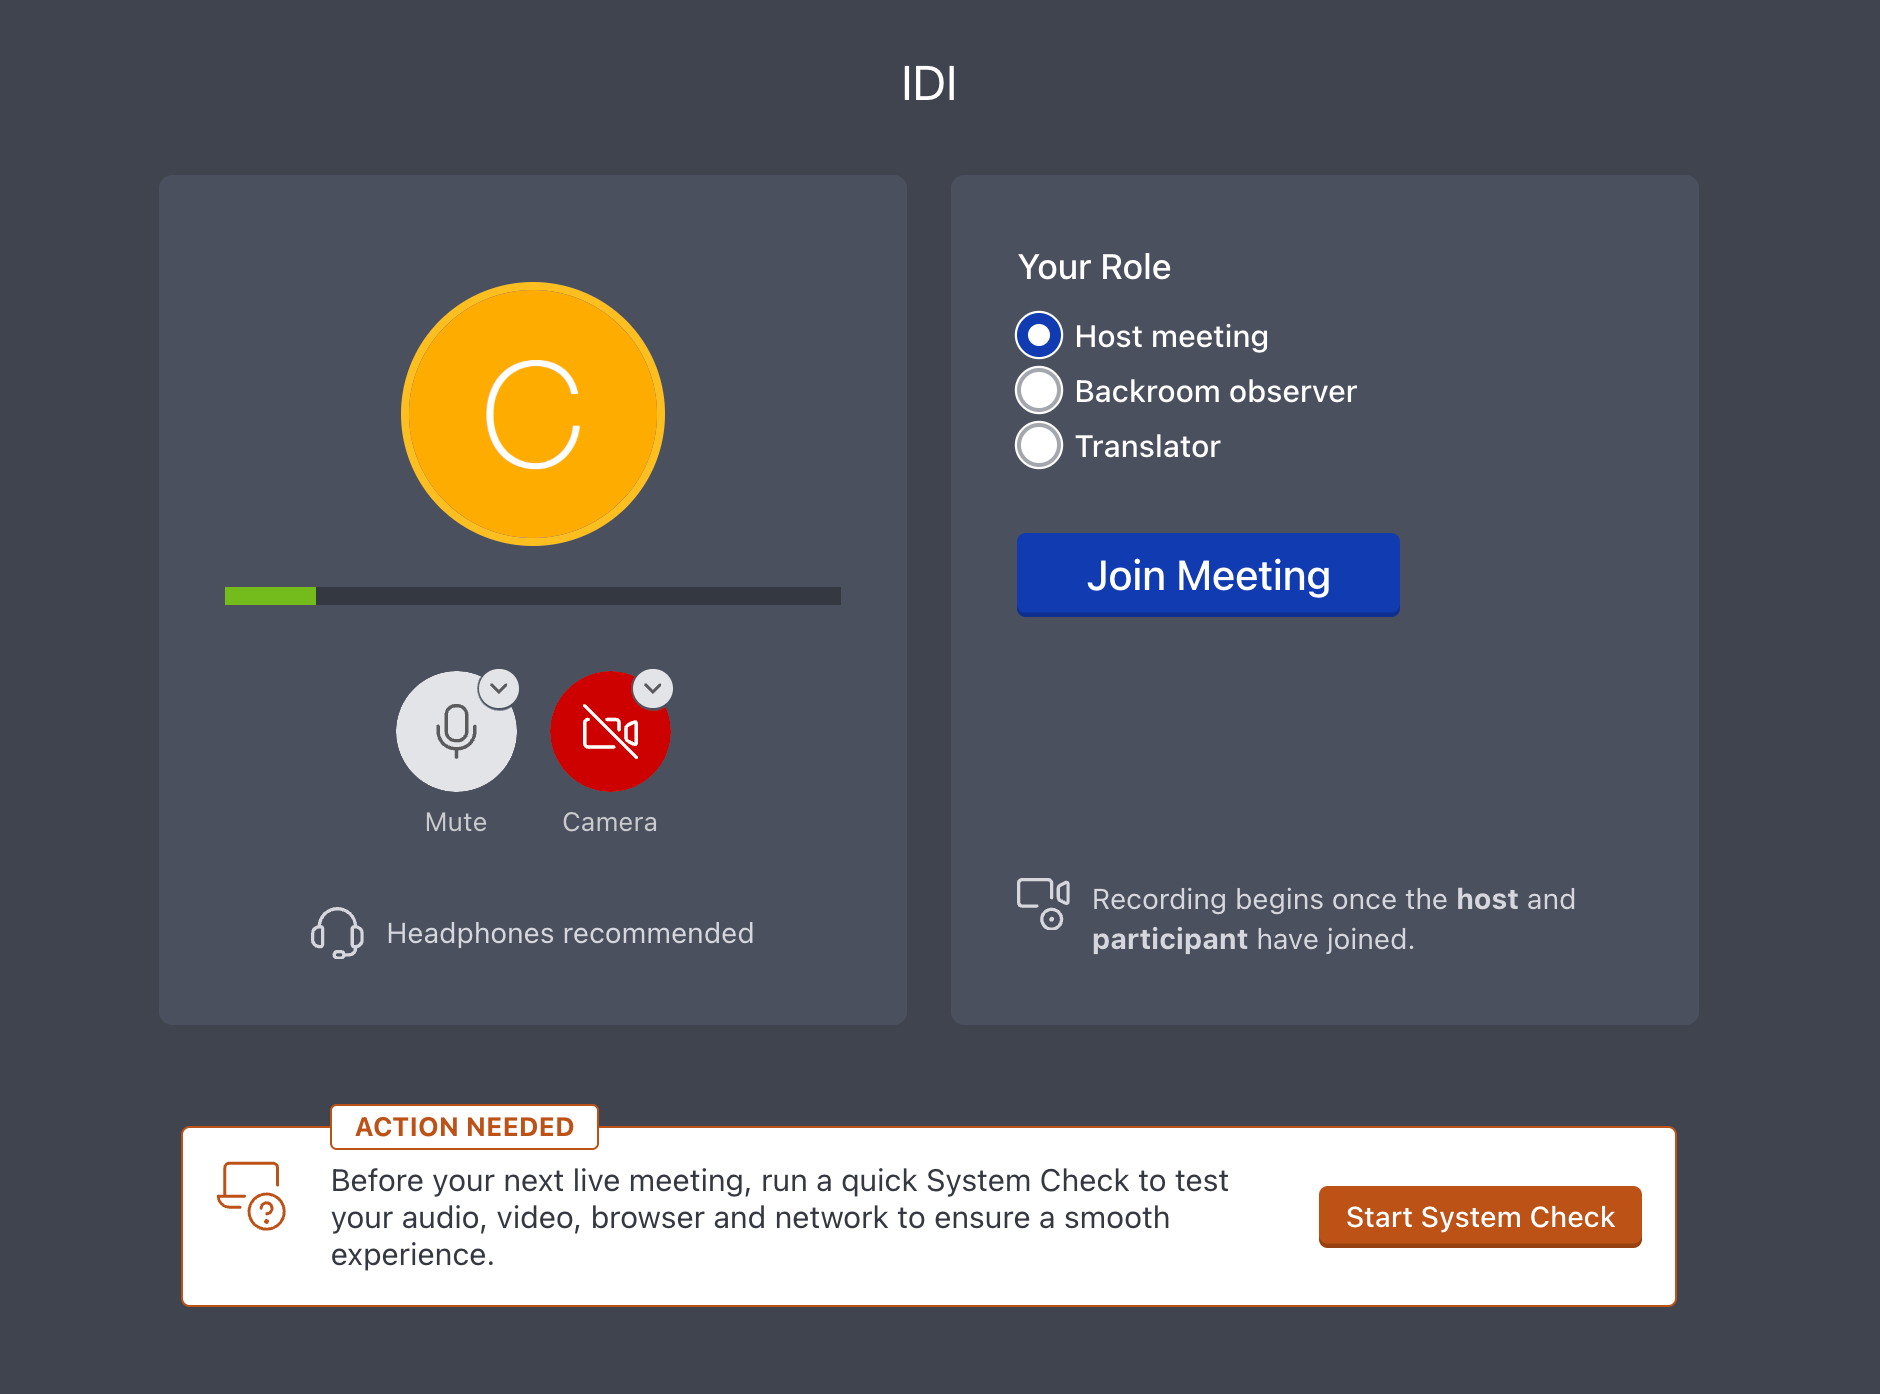
Clicking on this button opens a tech check page prior to entering the meeting. Here, attendees can confirm that their camera/microphone are working, and can choose to disable either of these before officially entering the meeting. Study Administrators will also have the option to choose their role for the meeting, noting that the “Host” role will only be visible to the configured host for the session.
Once the appropriate settings are configured, users can then enter the meeting by clicking the “Join Meeting” button.
Entry for Participants and Clients
If the Waiting Room is not enabled, participants will automatically be taken to the front room of the meeting independent of whether or not the Host has joined. Likewise, Clients will automatically be taken to the backroom.
If theWaiting Room is enabled, participants and clients will enter the Waiting Room until they are admitted or denied entry by a study administrator. While waiting, users will see the configured welcome message indicating they’ll be admitted shortly.

Once admitted, participants will automatically be taken to the front room of the meeting, and any clients will be taken to the backroom. If denied entry, users will see a custom message written by the Admin before being redirected back to the main activity page.
Entry for Analysts and Moderators
Moderators or Analysts who click “Join Meeting” will automatically be granted entry to the meeting room. Administrators who are not the configured Host for the session will be taken to the backroom by default. Whereas, the meeting Host will have the option to join the front room or the backroom of the meeting.
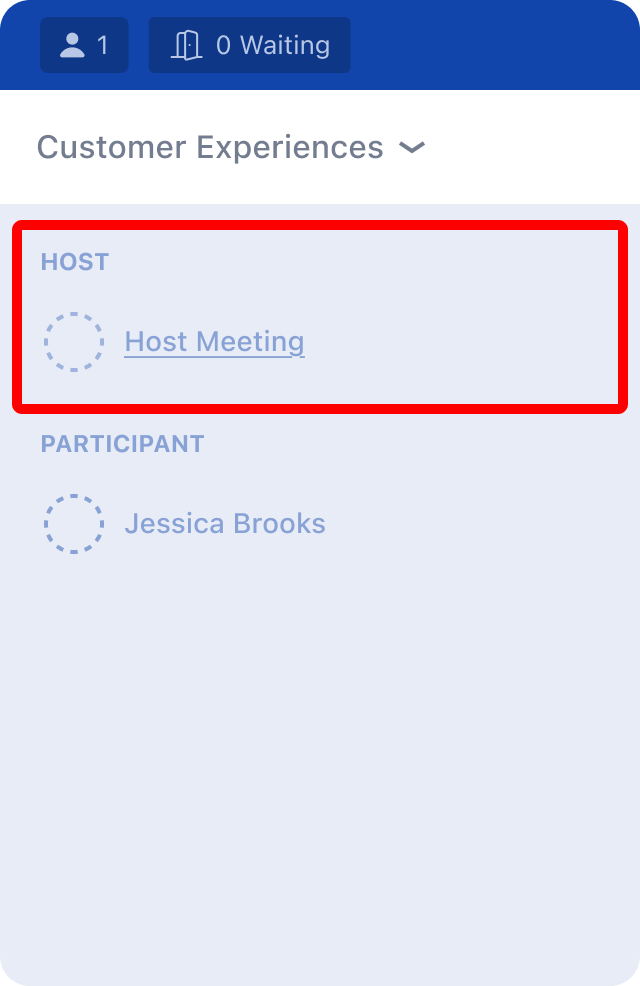
If there is currently no active host in the front room, Analysts or Moderators in the backroom have the option to open the directory and select “Host Meeting” to begin acting as Host for the session.
Waiting Room Controls
Analysts and Moderators can manage the Waiting Room from both the front room and backroom during a live session.
The Waiting Room panel displays all users currently waiting to join, allowing Admins to admit or deny users individually or in bulk. Participants and clients can be managed separately, making it easier to control the order in which users enter the session.

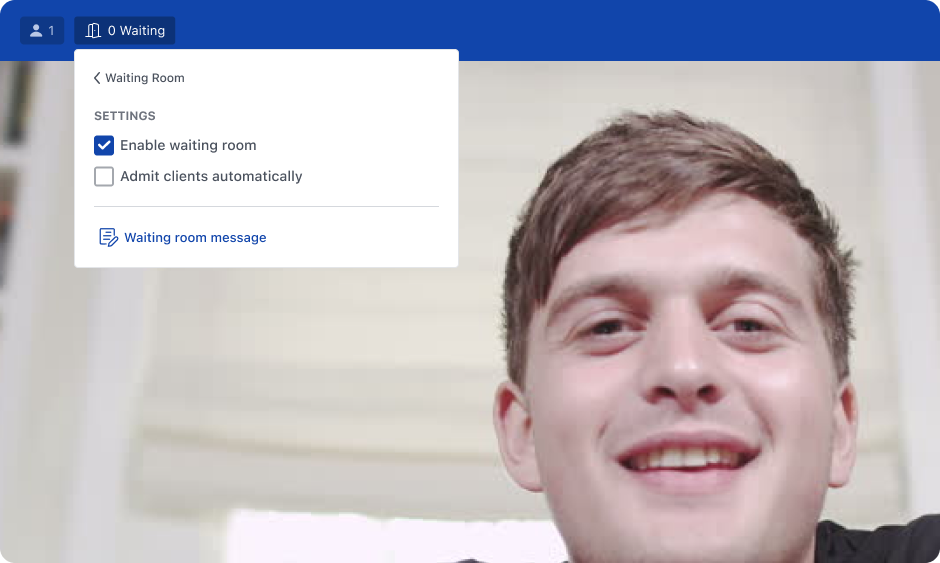
Analysts or Moderators can also update Waiting Room settings during the meeting, including enabling or disabling the Waiting Room, updating whether Clients are automatically admitted, or editing the welcome message in real time.
As soon as both the participant and the host have joined the meeting, the recording will begin.
Starting the Meeting Audio Early
When backroom audio is enabled, observers can collaborate with each other and the Host in the backroom audio channel. By default, the backroom audio channel does not start until the participant and Host join the meeting.
If observers wish to collaborate in the backroom audio channel before the participant joins, the Host has the option to start the meeting early. The option to start early will be visible to the Host at all times while waiting for the participant to join:

Starting the meeting early will consume Live Video Minutes. Once the meeting has been started, the participant may enter at any time.
Meeting Interface
Once in the meeting, a number of settings and options are integrated into the interface for easy access:
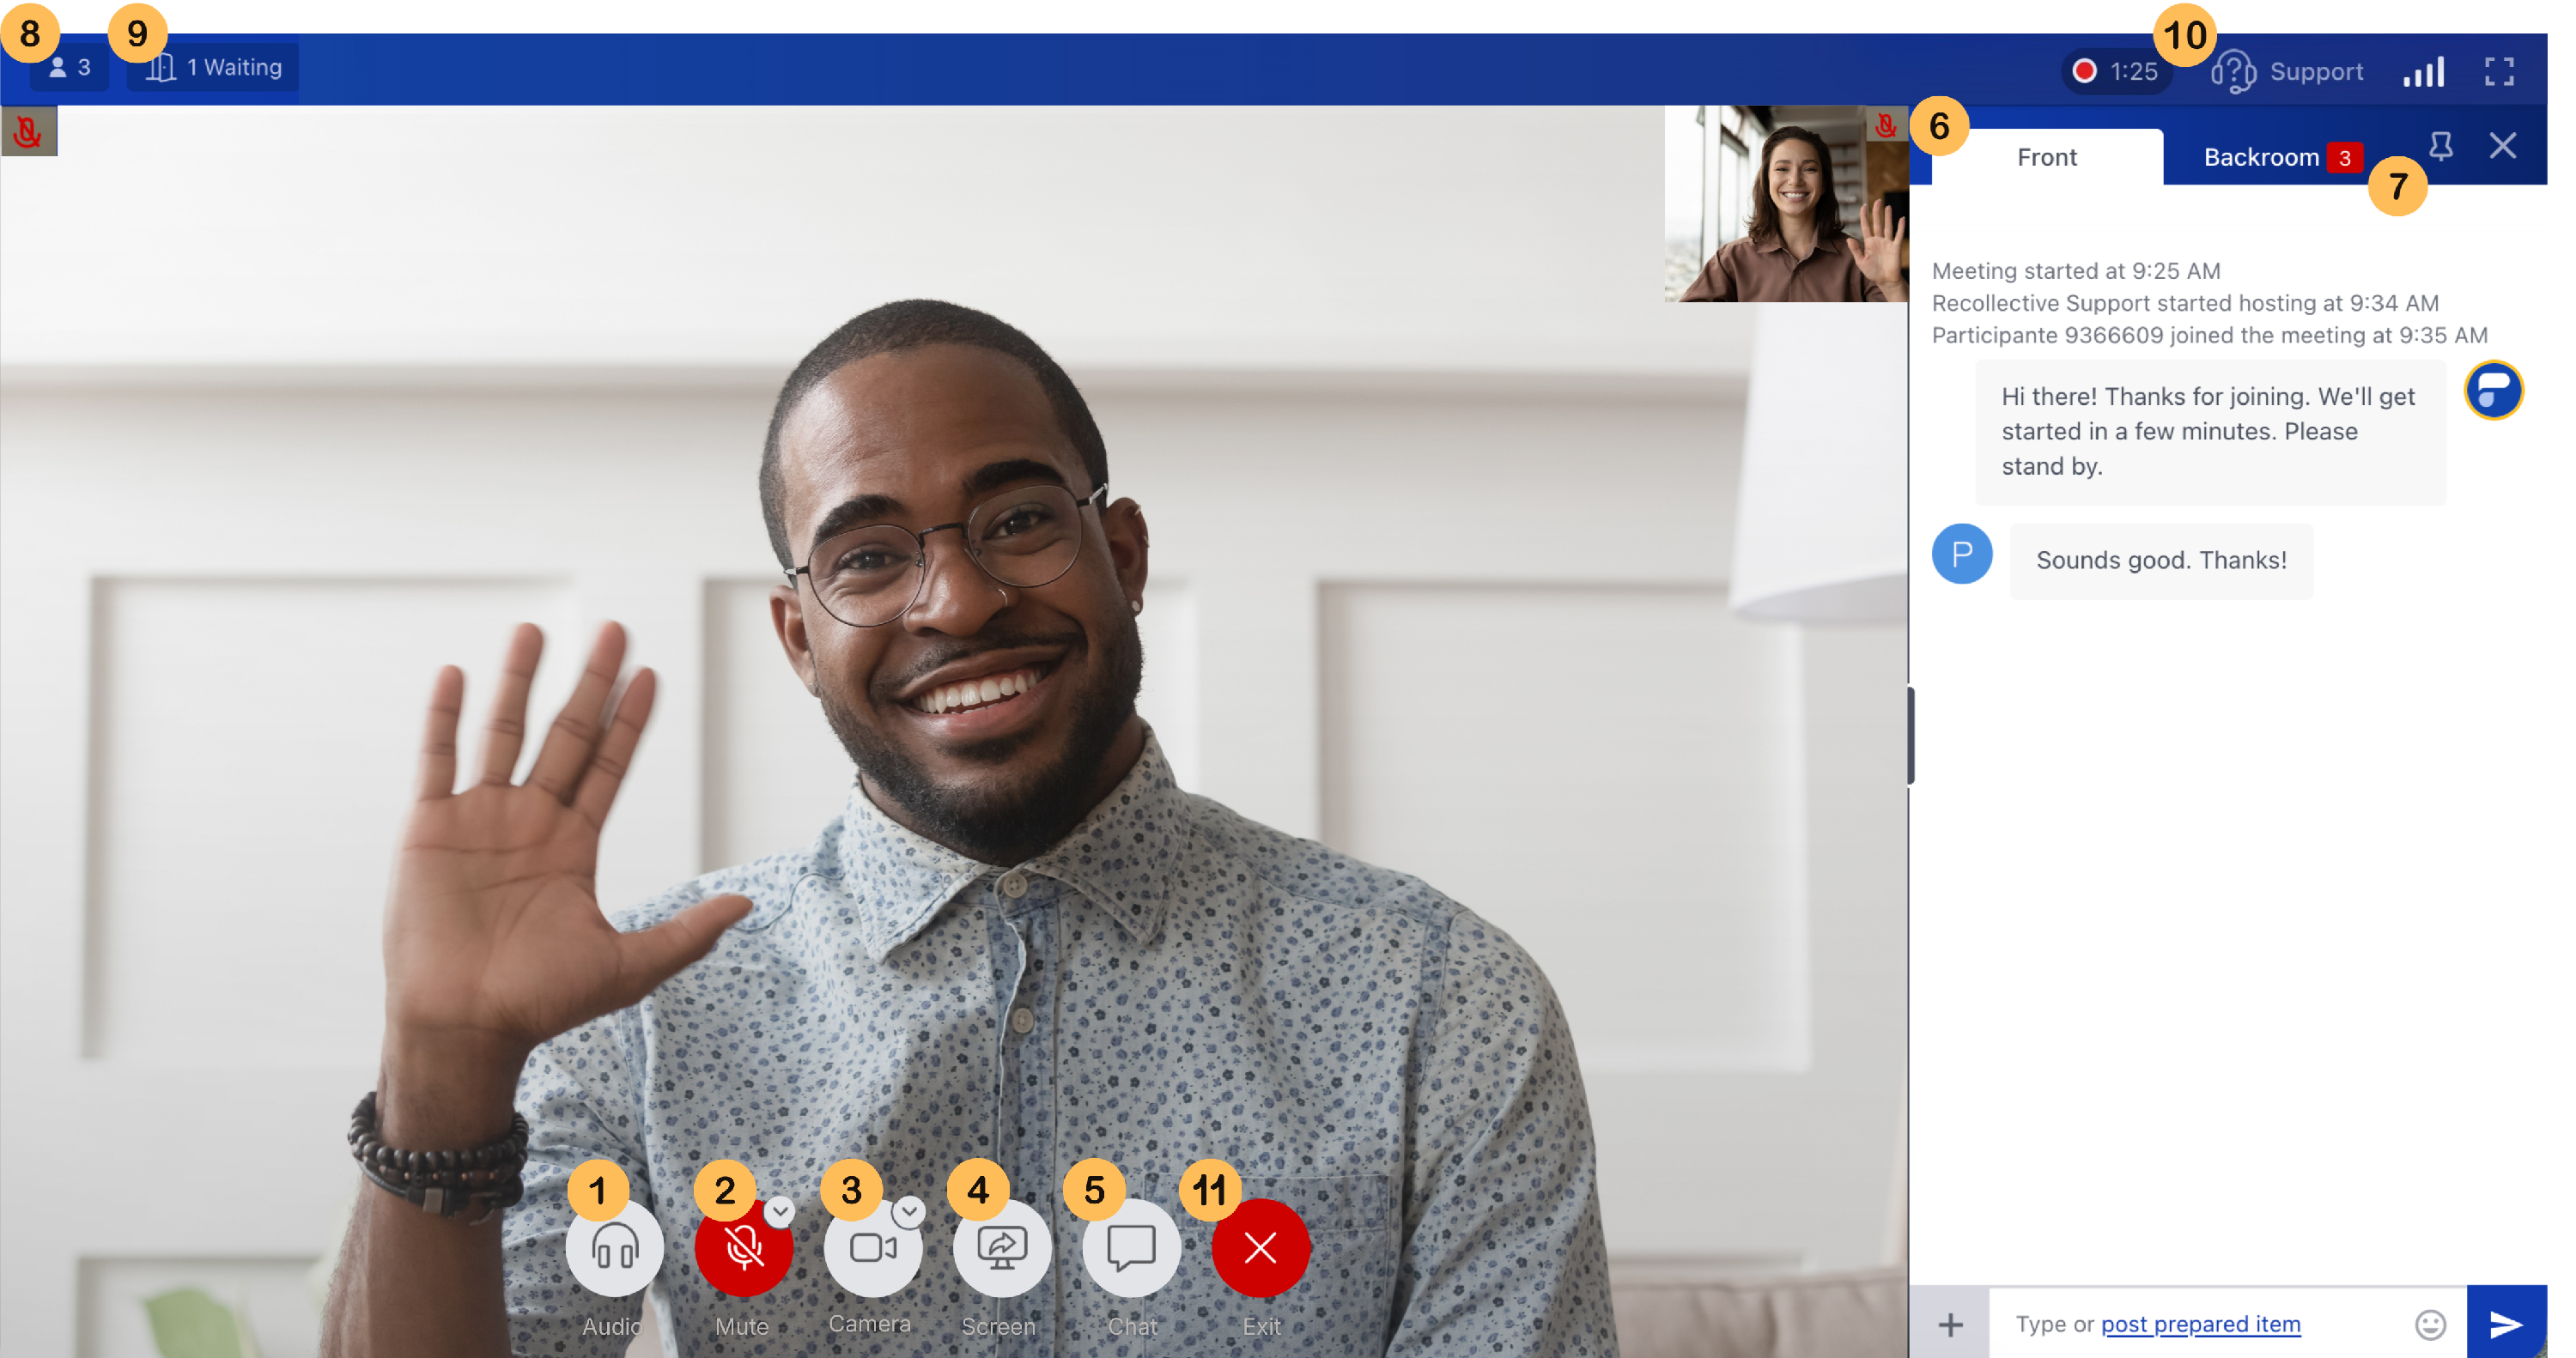
1. Audio Channel Controls: Live Activities can have multiple audio channels, such as a backroom with observers or a channel for simultaneous translation. This button allows you to determine which channel(s) you would like to hear. You can also select the Adjust Volume option to set custom volume for each available channel individually.
2. Microphone: This button can be used to toggle your microphone on and off, or to change your audio input or output device. Users can manage both microphone and speaker output from this control menu for improved audio quality and reliability. Users can also use the Test Speaker option within the device selection menu to verify their audio output upon joining.
3. Camera: This button can be used to toggle your camera on and off during the meeting, or, to change which camera you are using.
4. Screen Sharing: Hosts can use this button to share their screen with the participant or request that the participant share theirs. Once screen sharing is enabled, the user sharing their screen will have the option to choose whether to share their entire desktop, a specific application window, or a tab within an application window.
5. Meeting Chat Toggle: The meeting chat toggle can be used to open or close the chat. If the text-chat area is hidden, the icon will indicate when someone else is typing and when a new unread message has been sent. The chat message will also appear on screen as an overlay.

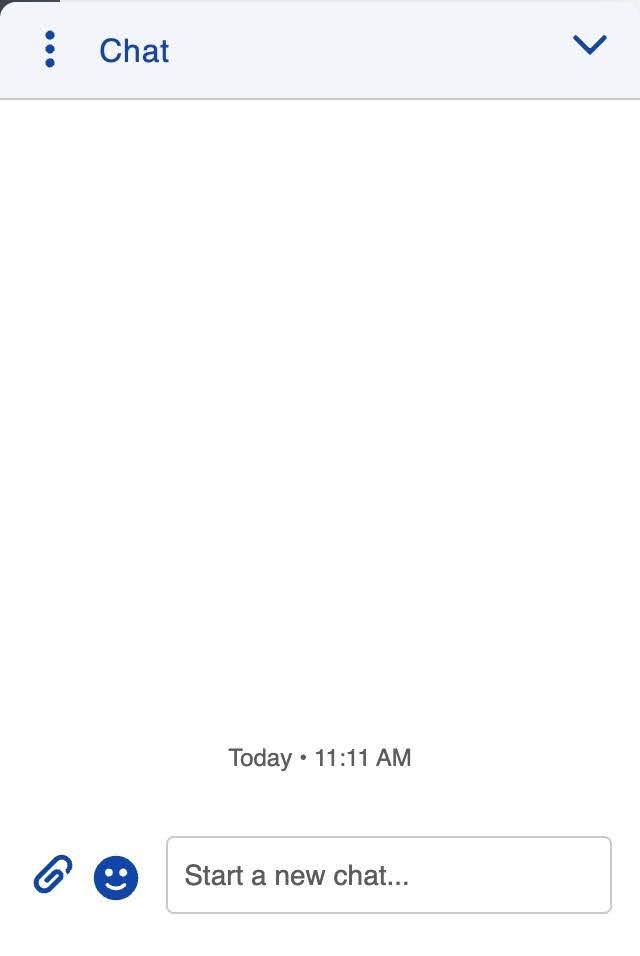
6. Meeting Chat Window: The meeting chat can be used to communicate in writing with the participant, share prepared content, or communicate with members of the backroom using the backroom tab within the chat window. The chat window will automatically open on the right side of your screen. You can use the pushpin icon in the upper right hand corner of the window to pop out the chat in a floating window (the same icon can be used to snap the chat back to the right as well).
Click here for a more detailed look at posting prepared content.
7. Backroom Chat tab: Click on the Backroom Chat tab to toggle between the front room chat and the backroom chat. The front room is visible to everyone in the meeting including the participant while the backroom is only visible to administrators. If you receive a message within a tab that you do not currently have open, a number will appear on that tab to indicate the number of new messages you have not viewed yet.

You can read our Live Video Interview Backroom article for more information on the backroom of Live Video Interviews!
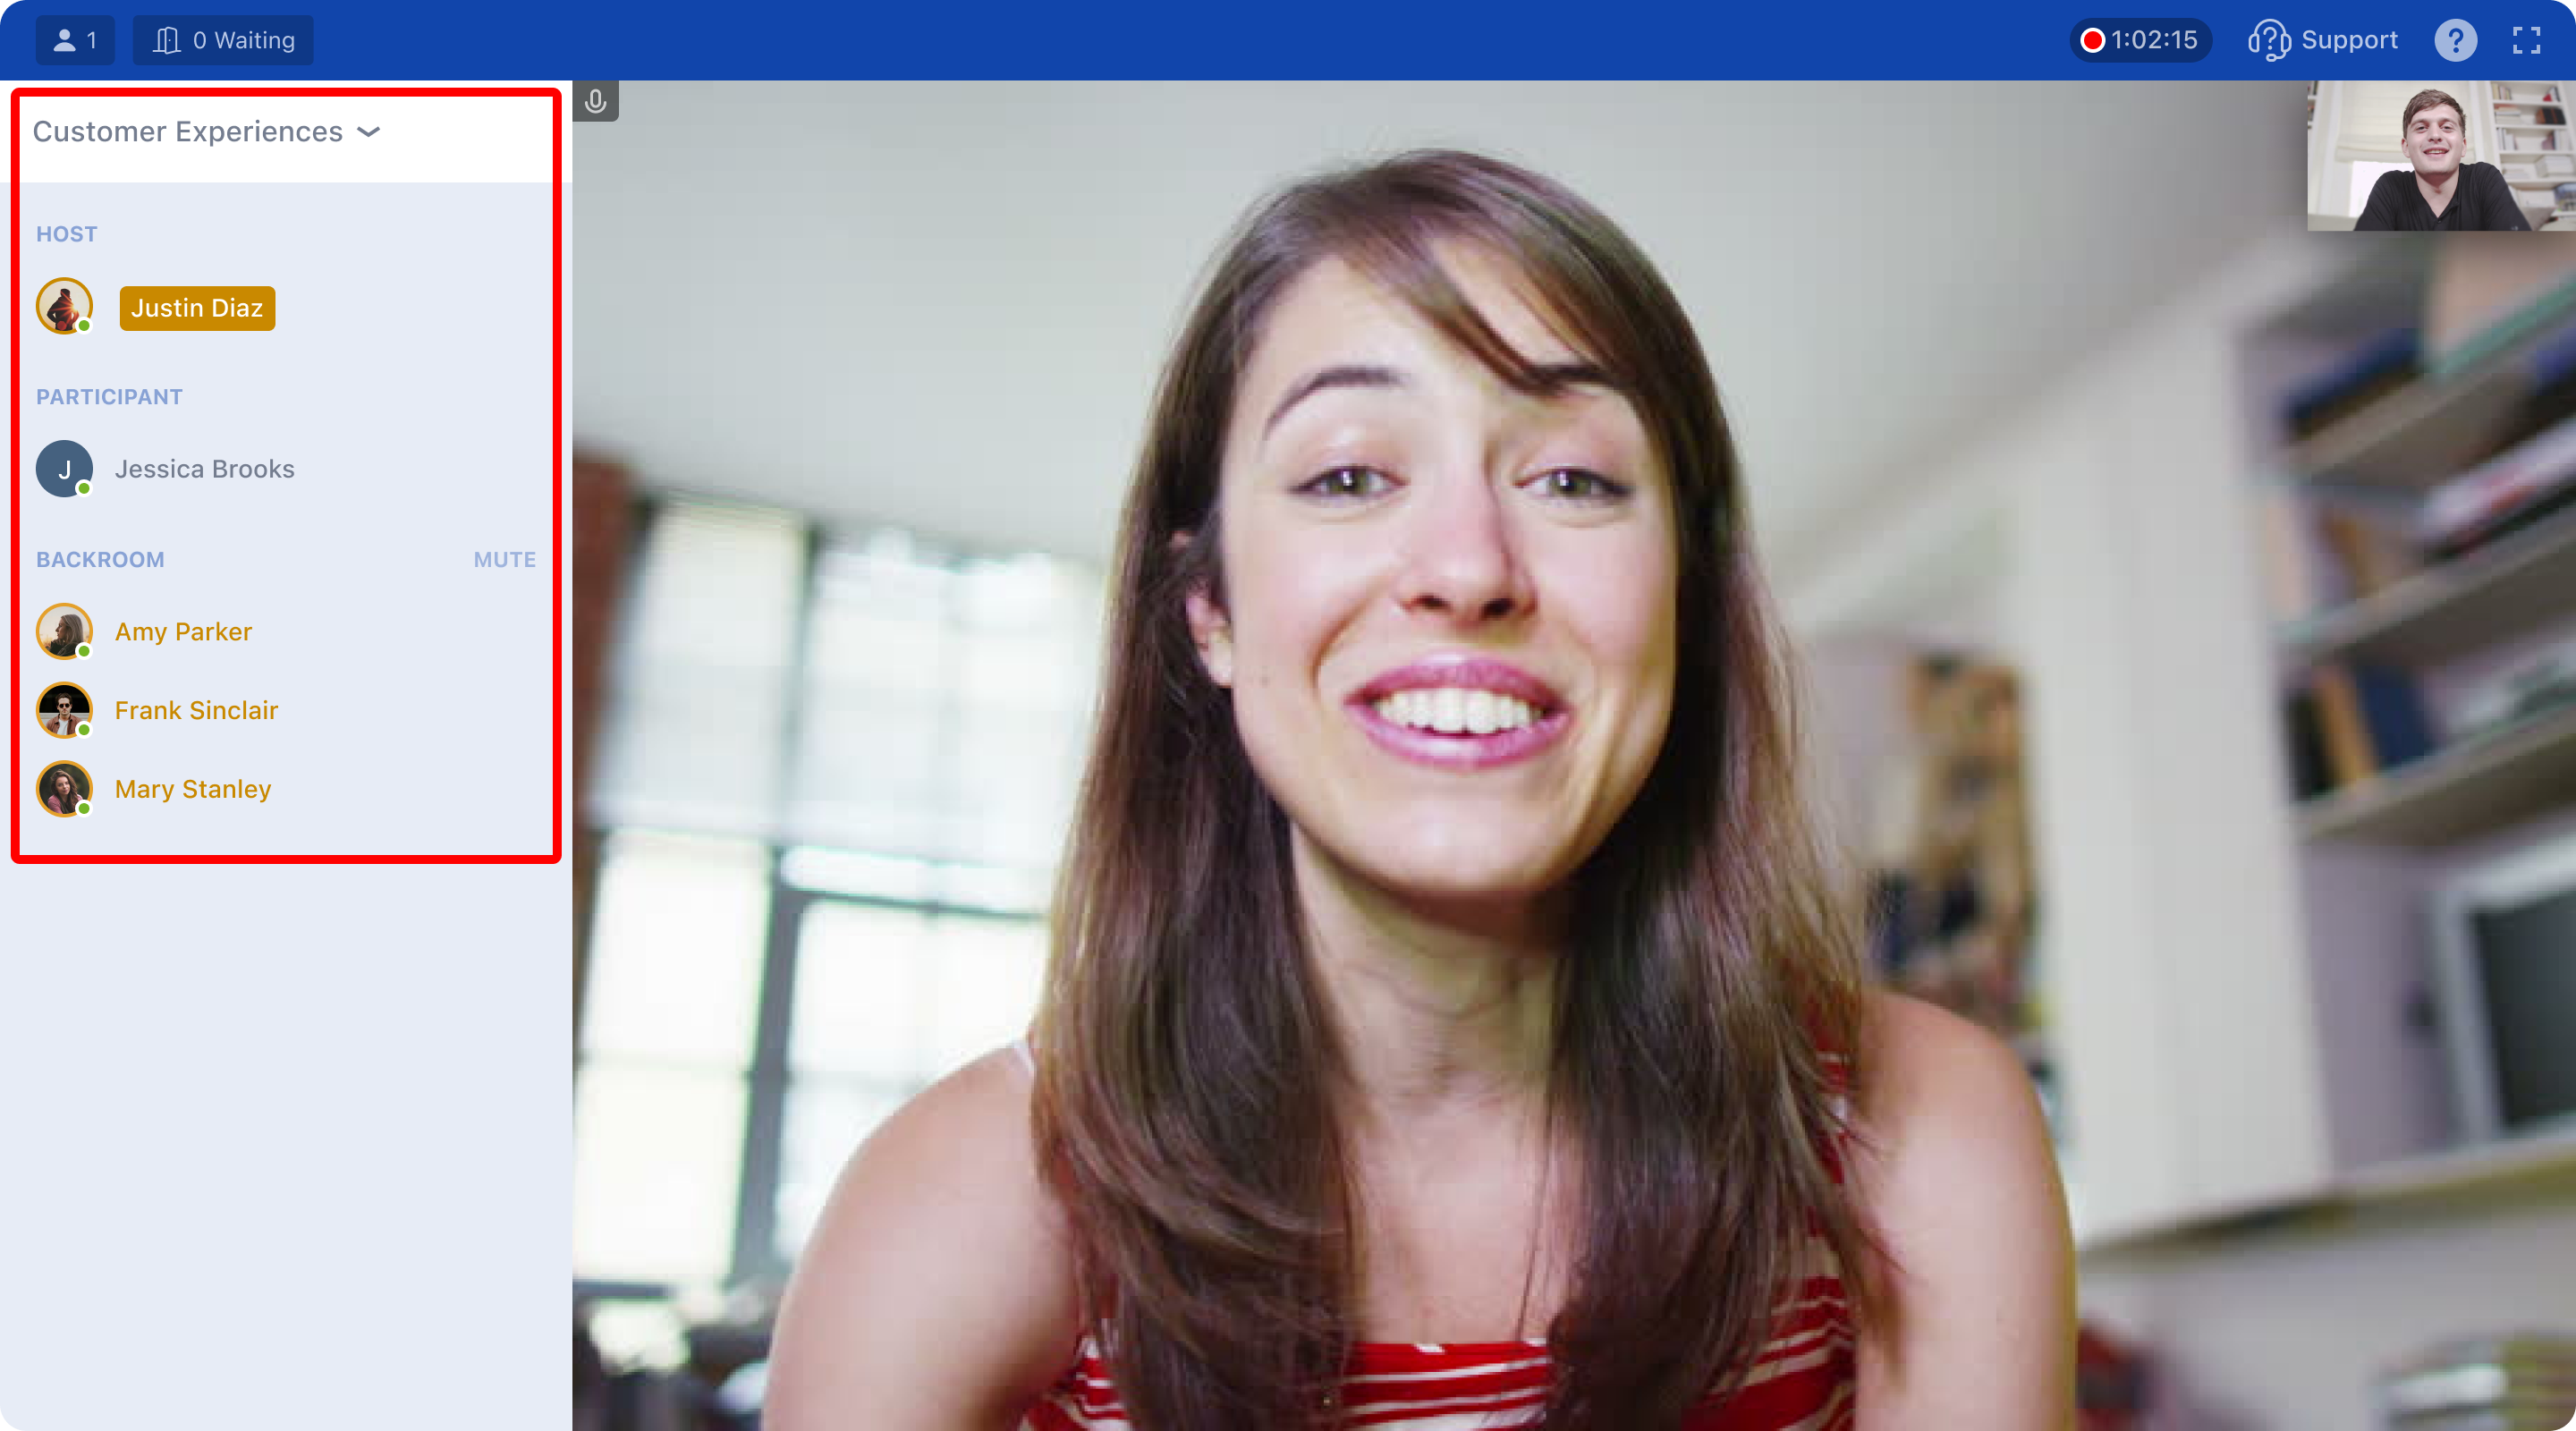
8. Participant Menu: This is where you can see everyone who is attending the meeting, including the participant, Translators, and Backroom Observers. Clicking on the participant’s name will automatically open the chat window. Hosts also have the ability to force mute participants and the backroom from this menu, as well as remove any participants from the session.
9. Waiting Room: This panel displays all users currently waiting to join, allowing Admins to admit or deny entry. Admins can also update Waiting Room settings and edit the welcome message in real time.
10. On-DemandSupport: If you encounter urgent technical issues during a live meeting, Moderators and Analysts can click on the Support button to open a live chat with Recollective’s support team. This allows you to get live, real-time assistance to resolve the issue as soon as it arises.
More information about On-Demand Support can be found here!
11. The Exit Activity button can be used to exit or end the meeting. Exiting the meeting will impact you only, as the meeting will continue to run in your absence and you can rejoin as needed. If you choose to end the meeting, it cannot be resumed.
