
External Content Activity
The External Content Activity type allows researchers to upload and analyze research data captured outside of Recollective. Researchers can bring externally captured video and audio recordings—such as interviews, focus groups, and UX sessions—directly into the platform for review and AI-powered analysis.
By consolidating qualitative data in one place, researchers can leverage the full power of Recollective’s AI capabilities without managing insights across disconnected tools. This allows admins to transform their Recollective site into a centralized insights hub that supports the full research workflow, regardless of where the data originated.
Creating an External Content Activity
Analysts and Moderators can create an External Content Activity to house and manage their imported recordings. This activity type is only visible to admins and will not be displayed to participants.
To create a new External Content Activity, follow these steps:
📍 Go to the Activities tab of your Study
- Click on Add Activity.
- Select External Content from the Activity Type menu.
- Enter an Activity Name.
- Optional: Set Activity Dates.
-
Note: Unlike other Activity Types, dates are optional for External Content and are used primarily for organization and tracking.
-
- Configure Activity Access to determine which Clients can view the uploaded content.
-
Note: By default, all clients will have read-only access to the activity unless otherwise configured.
-
- Optional: Add a Description for other admins and clients to reference.
- Click Next: Upload Content.

Uploading and Managing Files
Once the activity is created, admins can immediately begin uploading files. Files are managed within a centralized hub where their processing status and metadata are visible at a glance.

Uploading Content
Analysts and Moderators can upload files by dragging and dropping them into the activity or by browsing their local device.

During the upload process, admins must provide the following information for each file:
- Name: The identifier used for the file in the platform.
- Language: The language spoken in the recording (selected from your Study Languages).
- Source Date: The date on the file at the time of upload, which will be referenced by Ask AI.
- Speakers: Indicate if the recording features Single speaker (only one person is speaking in the recording) or Multiple speakers (more than one person is speaking in the recording).
- Number of Hosts: The number of moderators or admins in the recording. The system defaults to Auto-Detect unless otherwise configured.
If needed, admins will have the option to Cancel Upload, which will abandon all files in the current upload, or, use the Skip & remove option when uploading multiple files to cancel the upload of the current file and proceed to the next one.
After submitting the form, admins must keep their current tab open until the upload is complete. Once the status changes to Processing, they can close the tab or safely navigate away, and processing will continue in the background. Files are ready to view and analyze once they reach the Completed status.
Viewing Recordings
To view a recording, simply click on the file card to open the File Details page. From here, admins can review the file’s upload information or view the recording in-platform using the integrated media player.
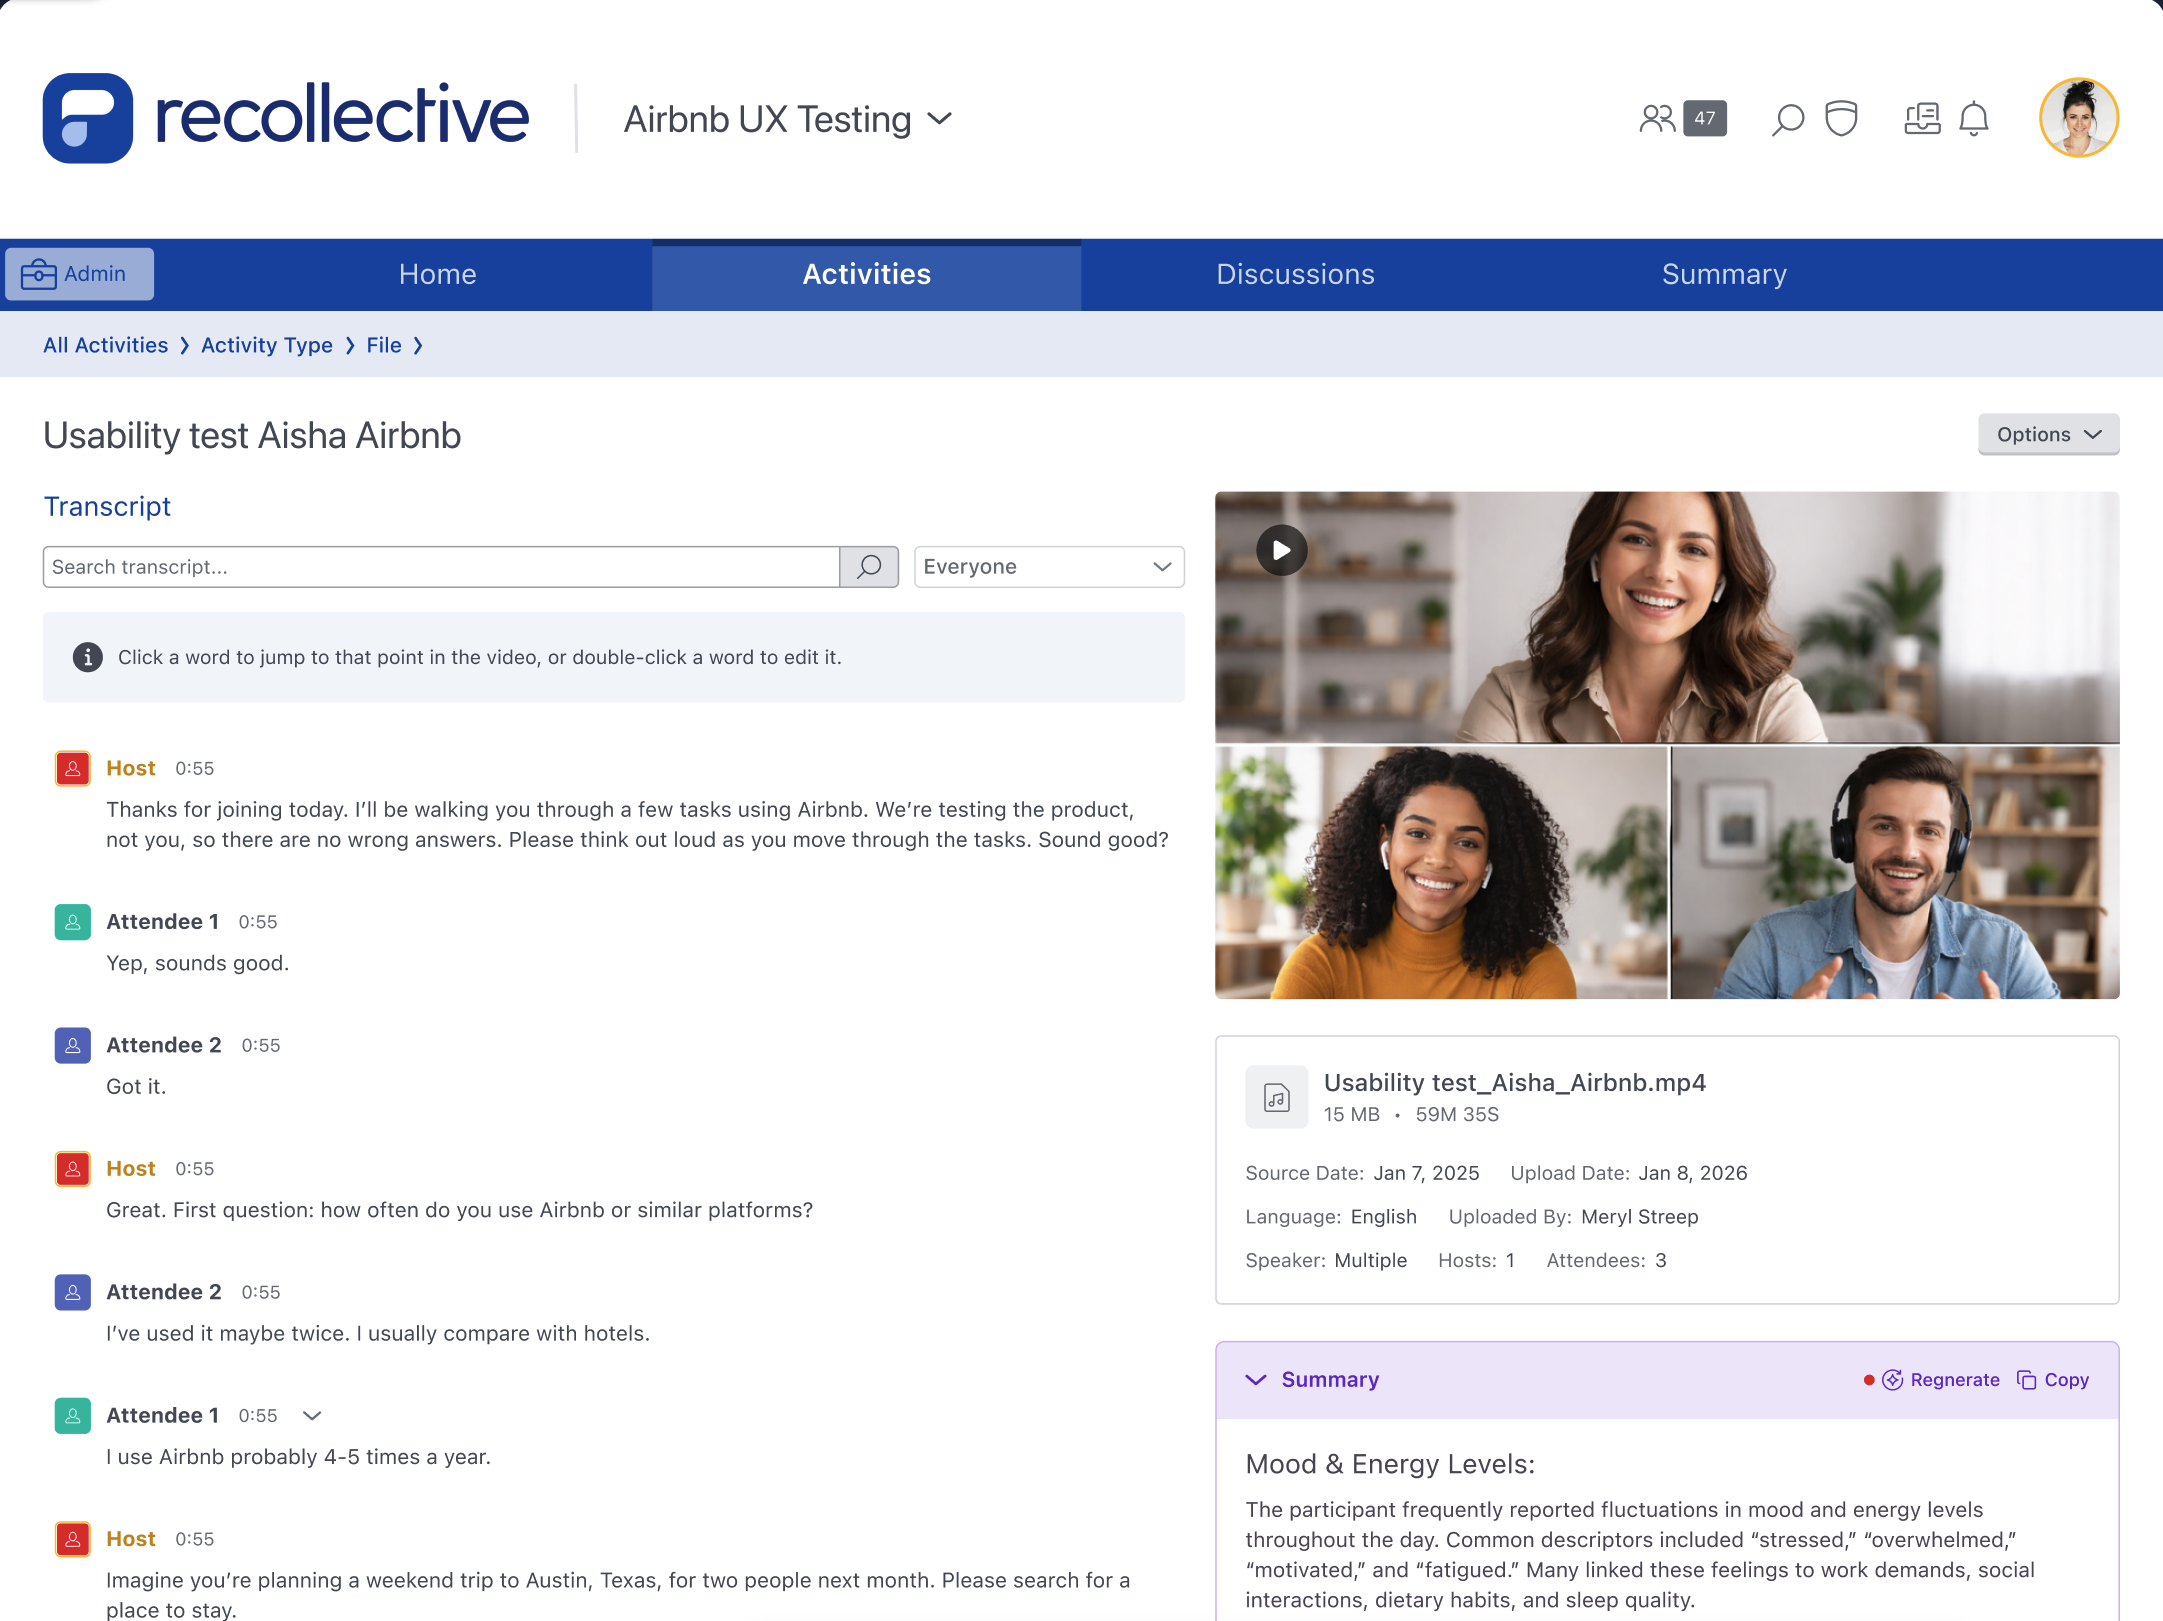
Admins can review the transcript in tandem with the uploaded media. This side-by-side layout allows for seamless playback management while following along in the transcript. To make analysis easier, the system identifies distinct speakers and assigns specific Roles to each, automatically organizing the resulting transcript by individual contributor:
- Host: An identified speaker equivalent to an Admin. Contributions are not included in AI Summaries, Ask AI, or the Word Cloud.
- Attendee: An identified speaker equivalent to a Participant. Contributions can be reviewed and analyzed using AI Summaries, Ask AI, and the Word Cloud.
Speaker names are applied automatically when they're stated in the transcript (e.g. "Hi, my name is Brian"). Speakers without a detected name keep their default identifier, Host or Attendee.
Interactive Transcript
Instant Playback: Click on a word in the transcript to instantly play the recording starting at the corresponding timestamp.
Transcript Editing: Transcript accuracy can vary based on sound quality and accent variations. Double-click any word to correct it, so your Word Clouds stay accurate.
- While editing a word, Press TAB to save the current edit and move to the next word.
- While editing a word, Press SHIFT-TAB to save the current edit and move to the previous word.
Speaker Options
Admins can access the following actions by clicking the dropdown arrow beside a speaker’s name:
- Assign Participant: Link the speaker to an active participant in the study to connect the external recording back to an existing profile. Available for Attendees only. Assignments are reversible and can be removed or reassigned at any time.
- <section>Note: Once a participant is assigned to an attendee, their contributions are synthesized with that participant's in-platform data in Ask AI.</section>
- Rename: Replace the speaker's label for easier identification. Speakers without a detected name keep a generic label (e.g. "Host 1", "Attendee 2").
- Change Role: Swap a speaker between Host and Attendee if the platform misidentified them.
- <section>Note: Changing a host to an attendee makes their contributions available in all AI outputs and Word Clouds, while changing an attendee to a host removes them.</section>
- Reassign message: Move a message to the correct speaker, so the transcript accurately reflects who said what. You can reassign an entire message or individual lines.

In-Platform Analysis
For every recording, Recollective automatically generates an AI Summary in addition to the associated transcript.
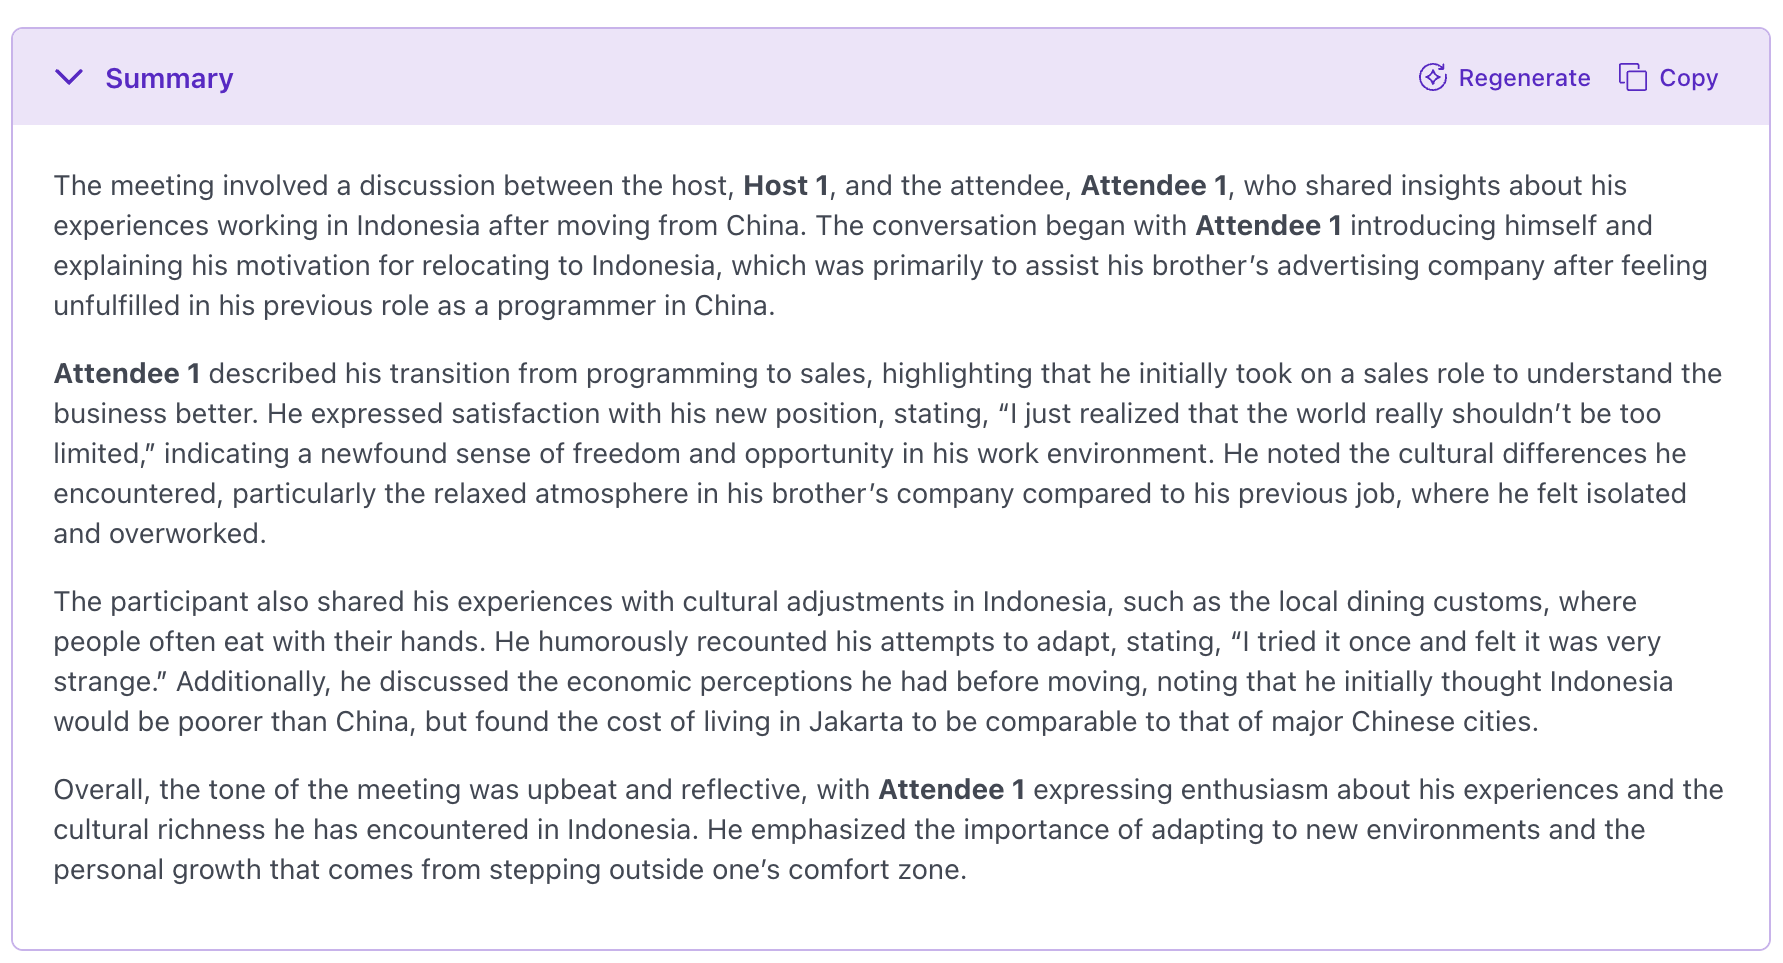
All transcribed speech from Attendees will be included in Ask AI and Word Clouds for analysis. Admins can filter to an External Content Activity to ask questions about uploaded data.
Saving Excerpts and Video Clips
Excerpts can be saved two ways: highlighting any transcribed text from an Attendee and selecting Save Excerpt, or saving directly from a Word Cloud. Saving an excerpt within the transcript opens the Excerpts side panel, where admins can play back the clip, apply a code, add it to a Playlist, or leave a Backroom Comment.
Once saved, these excerpts behave like any other video clip in the platform. They can be played, edited, downloaded, or added to a Video Playlist, and they appear in the Excerpts Report alongside all other saved excerpts.

File Options and Downloading & Exporting
On the file details page, admins are presented with an Options menu offering additional actions.
- Edit Properties: This action allows users to update the file properties provided during the initial upload process.
- Updating the Language, Source Date, Speakers, or Number of Hosts will trigger a re-transcription and undo any edits made to the transcript or saved excerpts.
- Re-Transcribe: This action will undo any transcript edits or saved excerpts and regenerate a new AI summary.
- Delete: This action will delete the entire file and its data from the activity. Excerpts and video clips will also be removed.
Each file in an External Content Activity offers the following export options:
- Download (Recording file)
- Export Transcript
- Export to HTML
- Export to Excel
These options are available from the File Details page under Options.
